Garage Door Opener Button You Can Reach!
The Button You'll Use Twice a Ride
Are you tired of fishing in a pocket or tank bag for your garage door opener? Maybe you've Velcro'd or bungied the remote to your handlebars? Well, let's hide that ugly little box in a handy spot.
What You'll Need
- Garage door opener
- Momentary contact (normally open) push button switch, smaller the better
- Soldering iron
- Drill and appropriate size bit to drill a hole for the switch
- Double sided tape
- A foot and a half of small gauge wire
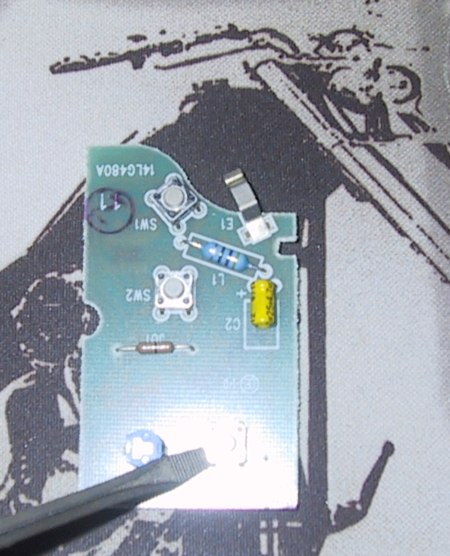
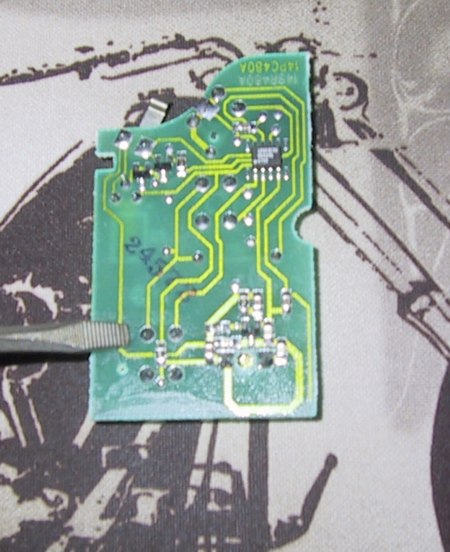
Using a Multimeter in continuity mode touch your leads to the two points you've identified and press the button (no battery connected). You should see continuity with the button pressed, none when the button is released. If that's the case you've found the solder spots you need. On most boards the soldered joints you need are very obvious like the one shown above (note the traces headed northward from the screwdriver) With some it may not be quite so obvious. This makes things just a little more challenging. Not a huge problem. Just connect the remote battery (using alligator clips) and short across switch connections until you find the combination of two that cycle the garage door. (talk about shade tree eh?)
Using small gauge wire (20 gauge or even smaller) solder the wire to those points on the circuit board.
Cut a relief to pass two wires through the remote case using a small file or Dremel. You can even drill a small hole for the wires.
Put the remote together and touch your two wires together. Your garage door should open/close just as though you'd pressed the switch. Good? Ok, use a little bit of silicone glue to seal up the hole you made for the wires to exit.
Now, where are you going to mount the remote? I chose the left side cover but if you have a fairing or some other handy place to mount both the push button and remote then have at it! The explanation that follows will mention the "side cover". In each case just change that to your location.
Determine where you want to put your switch. I placed mine at the very rear of the left side cover.

Drill a hole for your push button switch. Now test fit your remote on the 'top' of your side cover or other location and measure the amount of wire you'll need to reach your button. Cut your wire allowing at least a half inch more than you measured (better too long than too short).
Solder the two wires exiting your remote to the two posts on the switch and test by pushing the button. Your garage door should cycle. Good?
Install your push button in your chosen location and using double sided tape attach your remote to the top of the side cover.

Test your button again to be sure the door cycles. Good? Re-install your side cover (or fairing or whatever) and you're finished!
From now on when entering or exiting your garage all you have to do is reach down to the side cover and press the button to enter/exit your garage. No more ugly remotes cluttering up the bars and the whole project cost you about three bucks for a switch.
Cheers,
Gadget


